Example: early this past spring my daughter was down to 1 pair of good-fitting jeans and had outgrown most of her dresses. A problem, but not one we had a lot of money to solve. As a home health nurse who sees pretty much the same patients on a weekly basis, my driving route does not vary much. One day I had a patient cancel unexpectedly, right around lunch time. This resulted in my taking a different route to the next patient and some time to kill. Happened upon a garage sale and found 6 pair of name brand jeans in my daughter's size for $.50 each as well as 2 Sunday dresses for $.25 each. Coincidence? Nope. Answer to prayer? You betcha!
Fast forward 8 months and Christmas is coming on fast. My sister-in-law (who is a bigger pinterest junkie than I am) found an awesome picture frame to chalkboard project that was worthy of repeat.
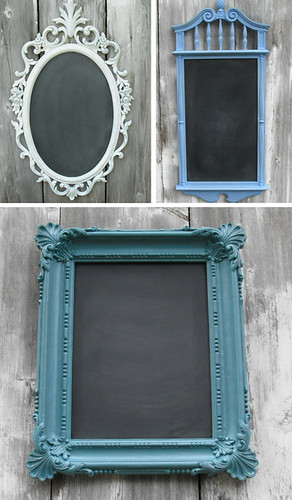
http://farm5.static.flickr.com/4077/4863951194_f2a4eca464.jpg
(FYI I just realized I have the exact same frame as the blue one on the bottom, but I turned mine into a necklace organizer. I'll post it for you sometime.)

Mirror to Chalkboard Transformation
Step 1: Clean all the dust filled nooks and crannies.
Step 2: Prep mirror to hold paint. I sanded mine with some heavy grit sandpaper I found in the garage, but I've seen other blogs use spray glass frost/etching. If you sand, make sure the whole mirror surface has a steamed up look, no shiny areas.
Step 3: Spray paint the entire thing, mirror and frame, with spray paint color of your choice. I used the $.96 stuff from Walmart. Multiple very light coats work best. Trust me, it's worth the time.

Step 4: Chalk board paint to the middle. Got that at Walmart, too. I think it was $4.96. It worked well. Follow the directions on the bottle. Had I known, I would have tried this:

http://www.snaptheconference.com/diy-chalk-paint-dresser/
This recipe makes a lot of paint, so cutting it down is recommended.
Step 5: Prep the dried chalkboard by rubbing it down with chalk.
I didn't get a finished project picture. Sorry. Just imagine the picture above with the middle completely painted black. Not too shabby for a $6 project, huh?
Point of the story, never underestimate God's power to provide.

